Grow a Garden Gear Guide 2026 — Every Sprinkler, Tool and Booster Explained
Gear is the layer between planting and profit that most new players ignore for too long. While pets and mutations get most of the attention in Grow a Garden, the right gear setup quietly multiplies everything your garden produces — faster growth, bigger fruits, higher mutation chances, and more valuable harvests across every session.
This guide covers every piece of gear currently available in Grow a Garden, what each one actually does, when to use it, and how to prioritise your Sheckle investment as you progress through the game.
Where to Get Gear in Grow a Garden
All gear is purchased from the Gear Shop, located directly in front of Sam’s Seed Shop on the other side of the map. The Gear Shop refreshes its stock every 5 minutes — a server-wide notification appears when a restock occurs.
Not all gear is available at all times. Some items only appear in the Gear Shop during specific events or on a rotation basis. If the item you need is not in stock, wait for the next 5-minute refresh. High-demand gear like the Master Sprinkler sells out quickly when it restocks — check the shop regularly rather than waiting passively.
Daily quests from Eloise occasionally reward gear items directly, which is another way to obtain tools without spending Sheckles.
Some gear is also available through the Travelling Merchant NPC who appears roughly every 4 hours near the crop stand. The Travelling Merchant sometimes carries gear not available in the regular Gear Shop rotation, including event-specific and limited items.
Sprinklers — The Most Important Gear Category
Sprinklers are the highest-impact gear in Grow a Garden. Every player at every stage of the game benefits from having at least one sprinkler active. They increase fruit size (which increases weight, which increases Sheckle value), accelerate growth speed, and in the case of specialised sprinklers, directly apply mutations to your crops.
Standard Sprinkler
The entry-level sprinkler. Place it in your garden and it accelerates the growth speed of all crops within its range and increases fruit size. The range is limited — one standard sprinkler does not cover your entire plot, so placement matters.
When to use it: From the moment you can afford it. The standard sprinkler pays for itself within a few harvests through increased fruit weight alone. This should be the first gear purchase for any new player after establishing a basic crop income.
Placement tip: Centre the sprinkler within your most densely planted section. Crops outside the sprinkler’s radius do not receive the growth and size benefits, so position it to maximise coverage of your highest-value crops.
Master Sprinkler
The upgraded version of the standard sprinkler with a significantly larger coverage radius and stronger growth acceleration and fruit size bonuses. The Master Sprinkler is one of the most sought-after gear items in the game because its larger range means one unit can cover substantially more of your garden.
What it does: Increases growth speed, increases fruit size (directly increasing weight and therefore Sheckle value), and boosts mutation chances for crops within its range. The mutation chance increase is a passive benefit — it does not apply a specific mutation but raises the probability that naturally occurring weather mutations will affect your crops.
When to use it: Replace your standard sprinklers with Master Sprinklers as soon as you can afford them. The investment is justified at any stage of the game. During AFK farming sessions, a Master Sprinkler covering your Beanstalk or Candy Blossom plots means heavier fruits across every growth cycle while you are offline.
Gear Shop note: The Master Sprinkler sells out quickly when it restocks. Check the Gear Shop frequently and buy when it appears rather than waiting for a “better time.”
Chocolate Sprinkler
The Chocolate Sprinkler functions like a standard sprinkler for growth and size — but it also applies the Chocolate mutation (2x multiplier) to crops within its range. This is a direct mutation application through gear rather than weather dependency.
What it does: Applies Choc mutation (2x) to growing crops in range, in addition to the standard growth speed and size benefits. The Choc mutation stacks with other mutations — a crop with Choc (2x) and Shocked (100x) carries a 200x combined multiplier instead of 100x.
When to use it: Use the Chocolate Sprinkler when you want consistent mutation coverage across your garden without waiting for weather events. It is particularly useful for AFK sessions where you want every growth cycle to produce at least a 2x mutated harvest regardless of weather conditions.
Stacking note: Choc is compatible with most other mutations. It does not conflict with Gold, Rainbow, Shocked, Moonlit, or most other commonly occurring mutations, making it one of the cleanest mutation-boosting gear items in the game.
Honey Sprinkler
The Honey Sprinkler applies the HoneyGlazed mutation (5x multiplier) to crops in its range. At 5x, HoneyGlazed is a meaningfully higher multiplier than Chocolate (2x), making the Honey Sprinkler a more valuable gear item for mutation farming.
What it does: Applies HoneyGlazed mutation (5x) to growing crops within range, alongside standard sprinkler benefits for growth speed and fruit size.
When to use it: Use the Honey Sprinkler as a direct upgrade path from the Chocolate Sprinkler. If you have access to a Honey Sprinkler and are choosing between the two, the Honey Sprinkler provides a higher base mutation multiplier on every crop it covers.
Combined with weather mutations: A crop carrying HoneyGlazed (5x) from the Honey Sprinkler that also picks up a Thunderstorm Shocked mutation (100x) carries a 500x combined multiplier. The gear-applied mutation is already on the fruit before the weather event hits, so the stack is immediate when weather arrives.
Flower Froster Sprinkler
A specialised sprinkler that applies cold-type mutations to flower crops specifically. It applies Chilled (2x) to flower-type plants in its range and has a specific interaction with Wet crops — a flower plant that is both Wet and Chilled creates the Frozen mutation (10x).
What it does: Applies Chilled mutation (2x) to flower crops in range. When used on a crop that already has the Wet mutation, it triggers the Frozen mutation (10x) instead.
When to use it: Most effective during rain weather events when your crops already carry the Wet mutation from the rain. The Flower Froster Sprinkler converts Wet flower crops to Frozen (10x) during that window — a significant multiplier increase from the sprinkler application alone.
Crop restriction: This sprinkler only benefits flower-type crops. For non-flower crops it has no mutation effect, though the growth and size benefits still apply to all crops in range.
Weather-Triggering Tools — Controlling Mutation Windows
These tools allow you to trigger specific weather events on demand rather than waiting for the game’s random weather rotation. They are among the highest-value gear items in the game for serious mutation farmers.
Lightning Rod
The Lightning Rod triggers a Thunderstorm event on your garden, applying the Shocked mutation (100x) to crops that are actively growing when it activates.
What it does: Manually triggers a thunder weather event affecting your crops. Crops in the active growing phase when the Lightning Rod fires have a chance to receive the Shocked mutation (100x).
Why this is exceptional: Shocked at 100x is the highest multiplier available through natural weather events. Waiting for a random Thunderstorm means farming around RNG. The Lightning Rod puts that 100x mutation window in your hands — you choose when to trigger it based on what is growing in your garden.
When to use it: Trigger the Lightning Rod when you have your highest-value crops actively growing. For maximum impact — plant your best exotic crops like Bone Blossom, Candy Blossom, or Suncoil, wait until they are in the mid-growth phase, then trigger the Lightning Rod. The Shocked mutation applied to high-base-value crops at this moment produces the highest possible return from a single gear use.
Stacking with sprinkler mutations: If your crops already carry a Chocolate (2x) or HoneyGlazed (5x) mutation from a sprinkler, triggering the Lightning Rod adds Shocked (100x) on top. A crop with HoneyGlazed (5x) and Shocked (100x) carries a 500x combined multiplier — from gear use alone, without any admin event.
Star Caller
The Star Caller triggers a Meteor Shower event, applying the Celestial mutation (120x) to growing crops.
What it does: Manually triggers a Meteor Shower weather event. Crops actively growing when it fires have a chance to receive Celestial (120x).
Why this is exceptional: At 120x, Celestial is one of the highest single-mutation multipliers in the game and is normally only available during random Meteor Shower weather events or the Meteor Shower admin event. The Star Caller gives you on-demand access to a 120x mutation window.
When to use it: Same principle as the Lightning Rod — time your Star Caller trigger for when your highest-value crops are in active growth. Celestial on a high-weight Suncoil or Candy Blossom produces one of the most valuable naturally achievable harvests in the game.
Aurora interaction: If your server has Aurora Borealis weather active at the same time as a Meteor Shower event (from the Star Caller), crops can receive both Celestial (120x) and Aurora (90x) simultaneously. These two mutations combine into the Cosmic combined mutation (240x) — one of the highest combined multipliers in the game. If you have both a Star Caller and Aurora weather occurring simultaneously, this is one of the best moments in all of Grow a Garden farming.
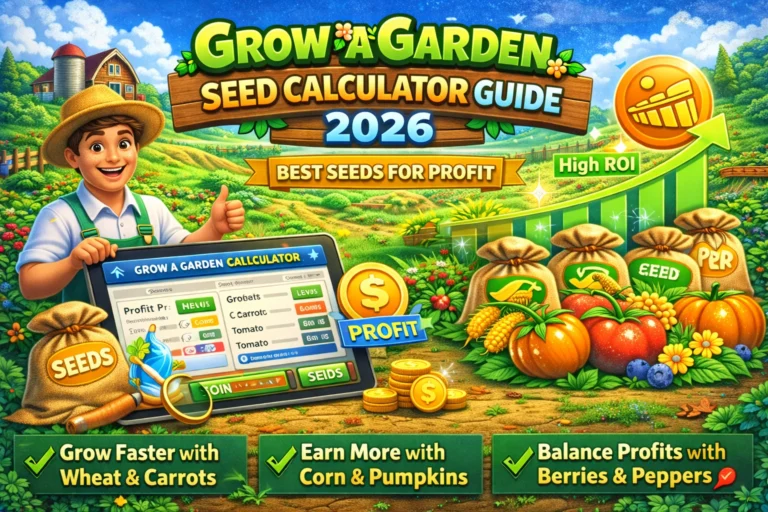
Calculator check: Before using a Star Caller, open the Grow a Garden Calculator, select your planted crop, apply Celestial (120x), enter a typical weight for that crop, and see the value. This tells you exactly what you stand to gain from the trigger and helps you decide whether now is the right moment or whether you should wait until higher-value crops are growing.
Night Staff
The Night Staff triggers a Night Event, applying the Moonlit mutation (2x) to growing crops.
What it does: Manually triggers a Night Event weather effect. Crops in the growing phase receive Moonlit (2x).
When to use it: Moonlit at 2x is the lowest multiplier among the triggerable weather tools, but it is not without value. The Night Staff is most useful as a stacking tool — use it when your crops already carry other mutations from sprinklers or previous weather events. Adding Moonlit (2x) on top of an existing Chocolate (2x) and Shocked (100x) stack produces a 400x combined multiplier instead of 200x.
Budget option: The Night Staff is typically more affordable and accessible than the Lightning Rod and Star Caller. For players who cannot yet afford the higher-tier weather tools, the Night Staff provides a controllable mutation window while building toward better gear.
Mutation Sprays — Targeted Single-Crop Application
Unlike sprinklers which affect all crops in a radius, mutation sprays are used on individual fruits to apply a specific mutation directly.
Chocolate Spray
Applies the Chocolate mutation (2x) to a single specific crop rather than a radius. Use this when you want to apply Choc to a particular high-value plant without affecting surrounding crops.
Disco Spray
Applies the Disco mutation (125x) directly to one crop. This is one of the most valuable sprays in the game — a direct 125x mutation on any crop of your choice. The Disco Spray is rare and expensive, but using it on a high-weight exotic crop like Suncoil or Candy Blossom can produce a multi-billion Sheckle single fruit.
When to use it: Save Disco Sprays for your highest-weight, highest-base-value crops. Do not waste a Disco Spray on a Carrot. Check the weight of your available exotic crops, run them through the Grow a Garden Calculator with Disco (125x) applied, and use the spray on the crop that produces the highest total value.
Verdant Spray
Applies the Verdant mutation (4x) to a single crop. Useful as a stacking tool on crops that already carry other mutations.
Cloudtouched Spray
Applies the Cloudtouched mutation (5x) to a single crop. A mid-tier spray useful for adding an additional multiplier layer to crops already carrying event or weather mutations.
Harvest Tools — Increasing Fruit Collection Efficiency
Basic Harvest Tool
Collects all ripe fruits from your garden in one use. Saves significant time compared to manually clicking each fruit individually — particularly useful during active farming sessions when you want to harvest quickly and replant before a weather event ends.
Advanced Harvest Tool
A higher-tier harvest tool that provides a chance to retain the crop after harvesting — effectively giving you a bonus fruit or preventing the single-harvest crop from being removed after collection. The exact retain chance varies by tool tier.
Gear Priority — What to Buy and When
If you are building your gear setup from scratch, this is the recommended investment order:
Stage 1 — New player (0 to 10,000 Sheckles): Buy a Standard Sprinkler as your first gear purchase. The weight and growth speed increase pays for itself immediately.
Stage 2 — Early to mid-game (10,000 to 500,000 Sheckles): Upgrade to a Master Sprinkler when available in the Gear Shop. Add a Chocolate Sprinkler for passive Choc mutation coverage. Buy a Night Staff as your first weather-triggering tool.
Stage 3 — Mid-game (500,000 to 50 million Sheckles): Buy a Lightning Rod. This is the single most impactful gear upgrade in the mid-game. On-demand Shocked (100x) mutations change your farming output entirely. Add a Honey Sprinkler to replace the Chocolate Sprinkler for higher base mutation coverage.
Stage 4 — Late game (50 million Sheckles+): Acquire a Star Caller for on-demand Celestial (120x) mutations. Save Disco Sprays for your highest-value crops. Stack multiple Master Sprinklers to cover all plots with maximum growth and size bonuses.
Gear and the Calculator — Using Both Together
Gear does not operate in isolation. Every sprinkler that increases fruit size, every Lightning Rod trigger, every spray application — these all change the calculated value of your crops. The correct workflow is:
Before triggering a weather tool: Open the Grow a Garden Calculator, select your planted crop, apply the mutation the tool will create, enter a typical weight, and check the projected value. This tells you whether the trigger is worth using now or whether you should wait for higher-value crops to be in growth.
After a sprinkler or spray mutation applies: Check the weight of the mutated fruit in your inventory, enter it in the calculator with all applied mutations, and see the exact Sheckle value before selling. Sprinkler-boosted fruits are often heavier than average — that weight difference is significant at the calculation stage.
Before a WFL trade involving gear-mutated crops: Use the Value to Weight tool to verify any trade offer on a crop you have gear-mutated. Spray-applied mutations like Disco (125x) make crops trade assets — verify the offer before accepting.
Gear Quick Reference Table
| Gear | Type | Effect | Key Benefit |
| Standard Sprinkler | Sprinkler | Growth speed + fruit size | Entry level — buy immediately |
| Master Sprinkler | Sprinkler | Larger range, stronger growth + size + mutation chance | Best all-round sprinkler |
| Chocolate Sprinkler | Sprinkler | Choc mutation (2x) + growth + size | Consistent 2x on every harvest |
| Honey Sprinkler | Sprinkler | HoneyGlazed mutation (5x) + growth + size | Upgrade from Chocolate Sprinkler |
| Flower Froster Sprinkler | Sprinkler | Chilled (2x) on flowers, Frozen (10x) when Wet | Specialist flower mutation tool |
| Lightning Rod | Weather Tool | Triggers Thunderstorm → Shocked (100x) | On-demand 100x mutation |
| Star Caller | Weather Tool | Triggers Meteor Shower → Celestial (120x) | On-demand 120x mutation |
| Night Staff | Weather Tool | Triggers Night Event → Moonlit (2x) | Affordable stacking tool |
| Chocolate Spray | Spray | Applies Choc (2x) to one crop | Targeted single-crop mutation |
| Disco Spray | Spray | Applies Disco (125x) to one crop | Highest value spray — use on best crop |
| Verdant Spray | Spray | Applies Verdant (4x) to one crop | Stacking supplement |
| Cloudtouched Spray | Spray | Applies Cloudtouched (5x) to one crop | Mid-tier spray |
Frequently Asked Questions About Grow a Garden Gear
Where is the Gear Shop in Grow a Garden? The Gear Shop is located directly in front of Sam’s Seed Shop on the opposite side of the map. Walk in a straight line from the Seed Shop to reach it. It refreshes stock every 5 minutes with a server-wide notification.
How often does the Master Sprinkler appear in the Gear Shop? The Master Sprinkler rotates in and out of stock. It does not appear every refresh cycle. Check the Gear Shop frequently rather than waiting for a set schedule — when it appears, buy it immediately as it sells out quickly.
Can I use multiple sprinklers at once? Yes. Multiple sprinklers can be placed in your garden simultaneously. Their effects apply to crops within each sprinkler’s individual range. Using a Master Sprinkler alongside a Honey Sprinkler means crops in the overlap zone receive both the HoneyGlazed mutation (5x) and the enhanced growth and size benefits of the Master Sprinkler.
Does the Lightning Rod guarantee a Shocked mutation? No. The Lightning Rod triggers a Thunderstorm weather event — crops actively growing in your garden during the event have a chance to receive the Shocked mutation (100x). It is not a guaranteed application per crop, but the trigger window is under your control which makes it far more reliable than waiting for random weather.
What happens if I use a Star Caller during Aurora Borealis weather? Crops can receive both Celestial (120x) from the Star Caller’s Meteor Shower and Aurora (90x) from the ongoing Aurora Borealis weather simultaneously. These two mutations fuse into the Cosmic combined mutation (240x) — one of the highest combined multipliers in the game. This overlap is one of the most valuable gear interactions possible in Grow a Garden.
Is the Disco Spray worth buying? Yes, but only if you use it on the right crop. A Disco Spray (125x) on a low-weight common crop produces modest returns. The same spray on a high-weight Suncoil or Candy Blossom produces a fruit potentially worth hundreds of billions of Sheckles. Always calculate the projected value on the Grow a Garden Calculator before applying a Disco Spray.
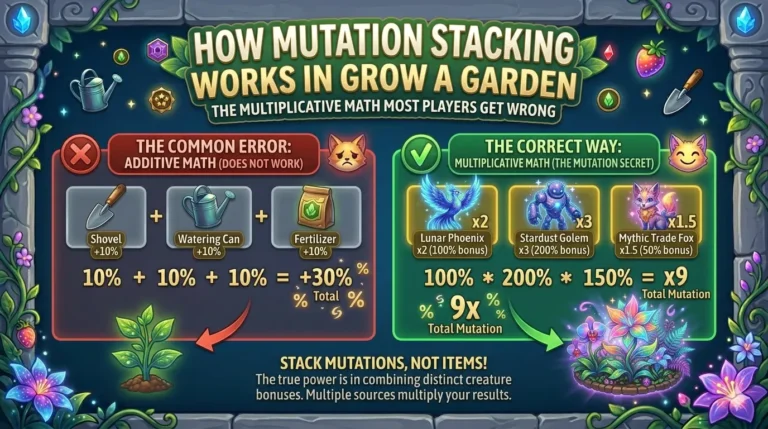
Can gear mutations stack with admin event mutations? Yes. Gear-applied mutations like Chocolate (2x) from the Chocolate Sprinkler or HoneyGlazed (5x) from the Honey Sprinkler stack multiplicatively with admin event mutations like Disco (125x) or Celestial (120x). This is one of the most powerful farming strategies in the game — pre-load your crops with sprinkler mutations, then trigger or wait for a high-multiplier admin event to hit on top of them.
Want to learn Grow a Garden AFK Farming Guide 2026 — Best Offline Strategies to Earn Sheckles While You Sleep. We have got it covered for you.
This guide covers the Roblox game Grow a Garden. All gear names, mutation effects, multipliers, and mechanics reflect the current live game state. For exact Sheckle values on any crop with any gear-applied mutation, use the Grow a Garden Calculator.
✔ Optimized layouts
✔ Grow a Garden Calculator planning
One Comment